Monday, February 7, 2011

Portraits

Group Shots


 Portraits


Environmental Shot

Labels:
1. Relaxing: 2-6-11; 12:06pm; Rexburg; F/8; 1/250; Nikon D3000
2. Bridge: 2-6-11; 12:16pm; Rexburg; F/8; 1/250; Nikon D3000
3. Emily 1: 2-6-11; 12:03pm; Rexburg; F/9; 1/200; Nikon D3000
4. Emily 2: 2-6-11; 12:22pm; Rexburg; F/10; 1/200; Nikon D3000
5. Samantha 1: 2-6-11; 11:49am; Rexburg; F/5.6; 1/2000; Nikon D3000
6. Samantha 2: 2-6-11; 12:00pm; Rexburg; F/9; 1/320; Nikon D3000
7. Just Dance: 2-5-11; 11:02pm; Rexburg- Northgate; F/3.8; 1/60; Nikon D3000

For these portraits, I focused a lot on posing the models. I don't feel that posing comes naturally to me so giving direction was a bit difficult. I went out a couple of times to take pictures of some friends but finally on this last shoot, the poses seemed to come more naturally. The environmental shot is of two of my friends playing "Just Dance" on the wii. This is definitely something that happens in my apartment often and an environment that these girls are comfortable in. When taking portraits, I also realized that getting a good angle on the subjects is key. I tried many different angles to see what ones worked the best.

Sunday, January 30, 2011

Panoramic

Original Shots


Panoramic


Labels:
1. Panoramic 1: 1-29-11; 11:10am; Rexburg Nature Park; F/9; 1/320; Nikon D3000
2. Panoramic 2: 1-29-11; 11:10am; Rexburg Nature Park; F/9; 1/320; Nikon D3000
3. Panoramic 3: 1-29-11; 11:10am; Rexburg Nature Park; F/9; 1/320; Nikon D3000
4. Panoramic 4: 1-29-11; 11:10am; Rexburg Nature Park; F/9; 1/320; Nikon D3000
5. Panoramic 5: 1-29-11; 11:11am; Rexburg Nature Park; F/9; 1/320; Nikon D3000
6. Full Panoramic: Using Photoshop Photomerge


It was hard for me to find something to take a panorama of that I thought would be interesting. I went to the Nature Park here in Rexburg and decided to take pictures of the frozen over lake. I then took those pictures into Photoshop and merged them using photomerge. What a great tool! It lined up all of my pictures into one continuous scene. I then flattened the image and cropped it to get rid of the weird shape of the picture.

Thursday, January 27, 2011

Camera RAW

Original Shot


Edited Shot


Original Shot


Edited Shot


Labels:
1. Danger: 1-20-11; 9:20am; BYUI library; F/5.6; 1/80; Nikon D3000
2. Danger Edited: Camera RAW
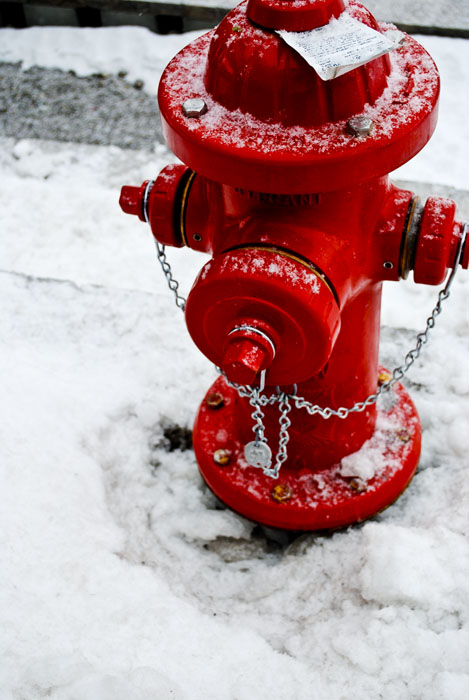
3. Fire Hydrant: 1-20-11; 9:14am; BYUI; F/5.6; 1/200; Nikon D3000
4. Fire Hydrant Edited: Camera RAW

So I have decided that I pretty much LOVE Camera RAW. I edited these pictures in regular Photoshop and thought they looked good and then I edited them in Camera RAW. What a huge difference! The Camera RAW photos came out so much more rich without looking saturated. To edit my photos in Camera RAW, I just used the sliders with brightness, exposure, vibrance, clarity and all of the other sliders in the basic pallet. Then for the "Danger" photo, I also added a small vignette for a more dramatic look. The tone curve pallet was also used to increase the highlights and decrease the low lights for more contrast.

Wednesday, January 19, 2011

Adjustment layers/ Smart objects

Original Shot

Edited Shot

Original Shot


Edited Shot


Labels:
1. Harrison: 1-8-11; 2:36pm; Rexburg, ID; F/5.6; 1/60; Nikon D3000
2. Harrison Edited: Used smart object and adjustment layers
3. Truck: 1-17-11; 8:37am; Idaho Falls, ID; F/29; 1/40; Aperture priority; Nikon D3000
4. Truck Edited: Used adjustment layers

For the picture "Harrison", the first thing that I did was apply a levels adjustment layer to brighten the whole picture up. I then added a hue/saturation adjustment layer. I brightened all of the colors up in this layer. Because I wanted the subject to stand out much more than the background, I decided that I would blur out the background. To do this, I turned the photo into a smart object. Once I had done this, I applied a smart filter added a gaussian blur. I then used the mask to unblur the subject. Finally, I added a new layer to create a burn border to draw more attention to the subject.

For the truck photograph, I again applied a levels adjustment layer to brighten up the whole picture. I then added a hue/saturation adjustment layer. I didn't like how this looked for the whole picture so I used the mask and masked out the snow and truck. I only wanted the sky to be brighter. I then wanted to make the sky a little more interesting and added a photo filter and masked out that same area.

Flora and Fauna


Labels:
1. Close Horse: 1-17-11; 8:32am; Idaho Falls, ID; F/4.5; 1/250; Aperture priority; Nikon D3000
2. Brush:1-13-11; 10:13am; BYUI; F/36; 1/8; Aperture priority; Nikon D3000
3. Cow: 1-17-11; 8:13am; Idaho Falls, ID; F/5.3; 1/30; Aperture priority; Nikon D3000
4. Horse: 1-17-11; 8:34am; Idaho Falls, ID; F/29; 1/100; Aperture priority; Nikon D3000
5. Red Tree:1-13-11; 9:58am; BYUI; F/5.6; 1/1250; Aperture priority; Nikon D3000

This was a fun assignment. It is more difficult to take pictures of moving things so taking pictures without any blur was challenging. I used aperture priority in all of these pictures because I am not comfortable with manual yet. Also, I tried to go take pictures earlier in the day when the lighting would be better. The biggest thing that I learned from this week was that it is important to take a lot of pictures because even when you think you might have a great shot, a different one might end up being better. I took about 200 pictures and only really liked about 10!

Thursday, January 13, 2011

Blending/ Type Effects

Blending 

Original Shot

Texture Shot

Edited Shot

Labels:
1. Train: 1-8-11; 3:08pm; Rexburg, ID; F/5.6; 1/200; Nikon D3000
2. Branches/Texture: 1-13-11; 10:12am; BYUI- Taylor; F/36; 1/13; Nikon D3000
3. Edited Train: Blending and burned edge in Photoshop

I blended these two pictures together by placing the branches photo over the train. I then lowered the opacity so that it was hard to distinguish that the texture was branches. Because the branches were so harsh of a texture, I lowered the opacity down to 10%. I wanted texture in more areas so I flipped the texture picture and had two separate pictures with really low opacity. I then applied a burn border. I wanted this border rather thick to suck the viewer into the lines of the train and tracks. The opacity of the border is 70% to make the border not so harsh.

Type Effects

Original Shot

Edited Shot

Labels:
1. Trees: 1-13-11; 9:58am; BYUI, ID; F/5; 1/1600; Aperture priority; Nikon D3000
2. Trees Edited- Tree picture with light border with text overlay

I wanted this picture to have a lighter feel. I first increased the saturation to make it brighter. Then I followed one of the tutorials from the book and applied the text. The font color is taken from the trees and its opacity was decreased to 60% so it was not as harsh. A white border was applied by using a Gaussian blur with an opacity of 59%.

Color Study


Labels:
1. Construction: 1-8-11; 8:06am; Northgate-Rexburg; F/9; 1/60; Manual; Nikon D3000
2. Lemons: 1-13-11; 1:48pm; Rexburg, ID; F/5.6; 1/60; Nikon D3000
3. Pencils: 1-11-11; 2:36pm; Rexburg, ID; F/5.6; 1/15; Aperture priority; Nikon D3000
4. Signs: 1-17-11; 10:51am; BYUI- Kimball; F/3.5; 1/1000; Aperture priority; Nikon D3000
5. Leaf: 1-17-11; 10:52am; BYUI- Kimball; F/8; 1/100; Aperture priority; Nikon D3000

I decided to focus on the color yellow for the color study. I found that even though everything appears to be covered in snow and white, there are still burst of colors that can be seen. For these pictures I tried to take a variety of different angles and use different F stops and such. Because I am fairly new to these concepts, there is definitely room for improvement. The picture of the leaf shows a shallow depth of field with just the yellow leaf in focus. The signs show a deep depth of field with both being in focused even though they are quite a bit of space apart.